
Metamask is our current wallet of choice for using the Gnosis network. It is the most universal wallet currently for web3. This tutorial will guide you through the process of installing and setting up the Metamask wallet for the Gnosis network.
Step 1: Head to https://metamask.io/download.html and download MetaMask for the device you want to install it on (we recommend using it on windows with chrome) & proceed through the installation including backing up your new wallet or importing an existing wallet.
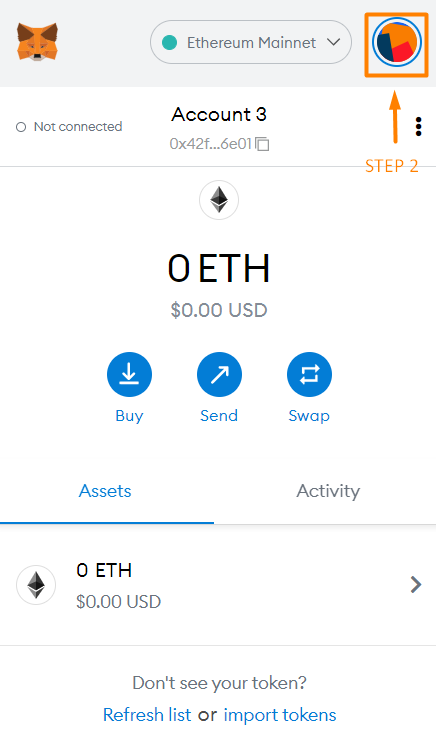
Step 2: Open your Metamask wallet (by clicking the extension in your browser) and clicking on your account (circle in the top right of your Metamask) as shown.
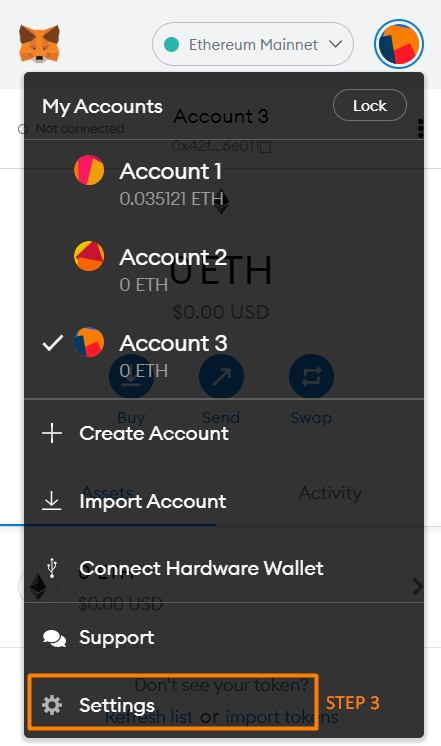
Step 3: Go to your Metamask account and click on the ‘Settings’ option.
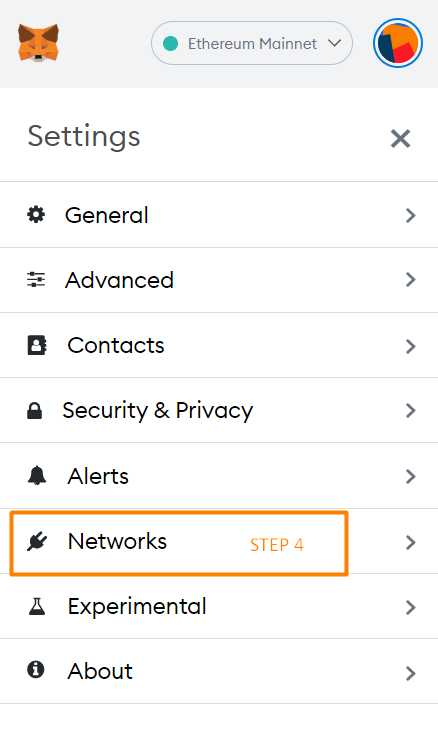
Step 4:Choose ‘Networks’ as shown.
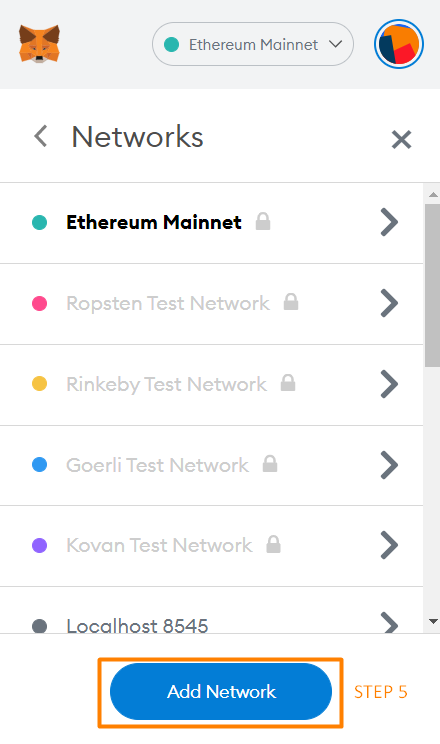
Step 5:Click on ‘Add Network’ as shown.
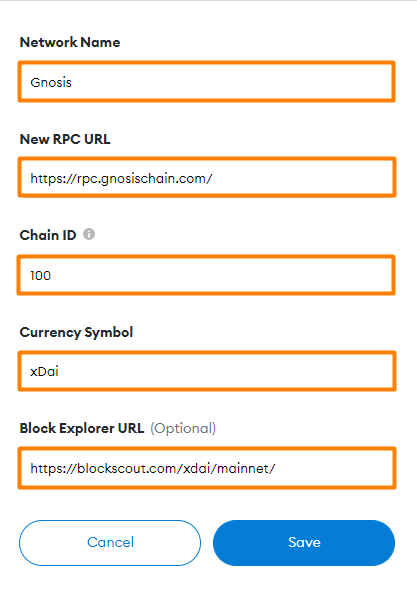
Step 6:Enter the following information for Gnosis chain as shown below and click 'Save'.
Network Name: Gnosis
New RPC URL: https://rpc.gnosischain.com/
Chain ID: 100
Symbol: xDai
Block Explorer URL: https://blockscout.com/xdai/mainnet/
Alternative ‘New RPC URL’s:
https://dai.poa.network/
https://xdai.poanetwork.dev/
https://xdai.1hive.org/
Alternative Chain ID: 100
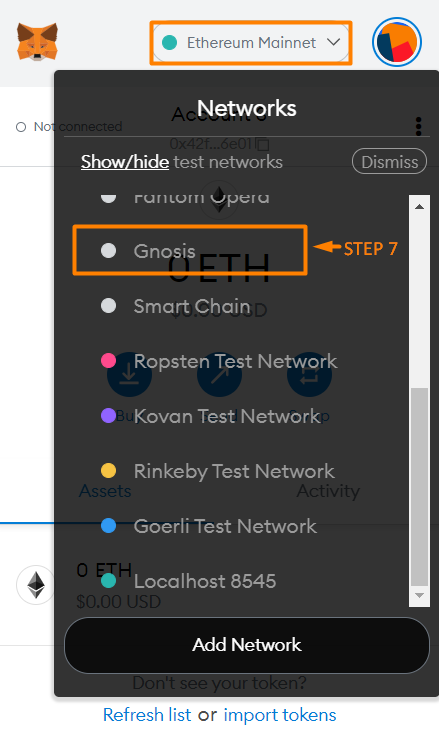
Step 7:Now just choose the Gnosis network you created and your Metamask wallet is ready to function on Honeyswap and on the Gnosis network.
Homepage
Next Tutorial