
There are currently two bridges to the Gnosis network. If you want to transfer to layer 2, you must go through the bridges as they act as a gateway between the two networks.
Step 1: Go to https://dai-bridge.poa.network/ Once on the DAI Bridge, select the network you wish to transfer from. If you are transferring from Ethereum to layer 2 Gnosis, use the ‘ETH Mainnet’, if you are transferring from Gnosis layer 2 to Ethereum, use the ‘Gnosis Chain’.
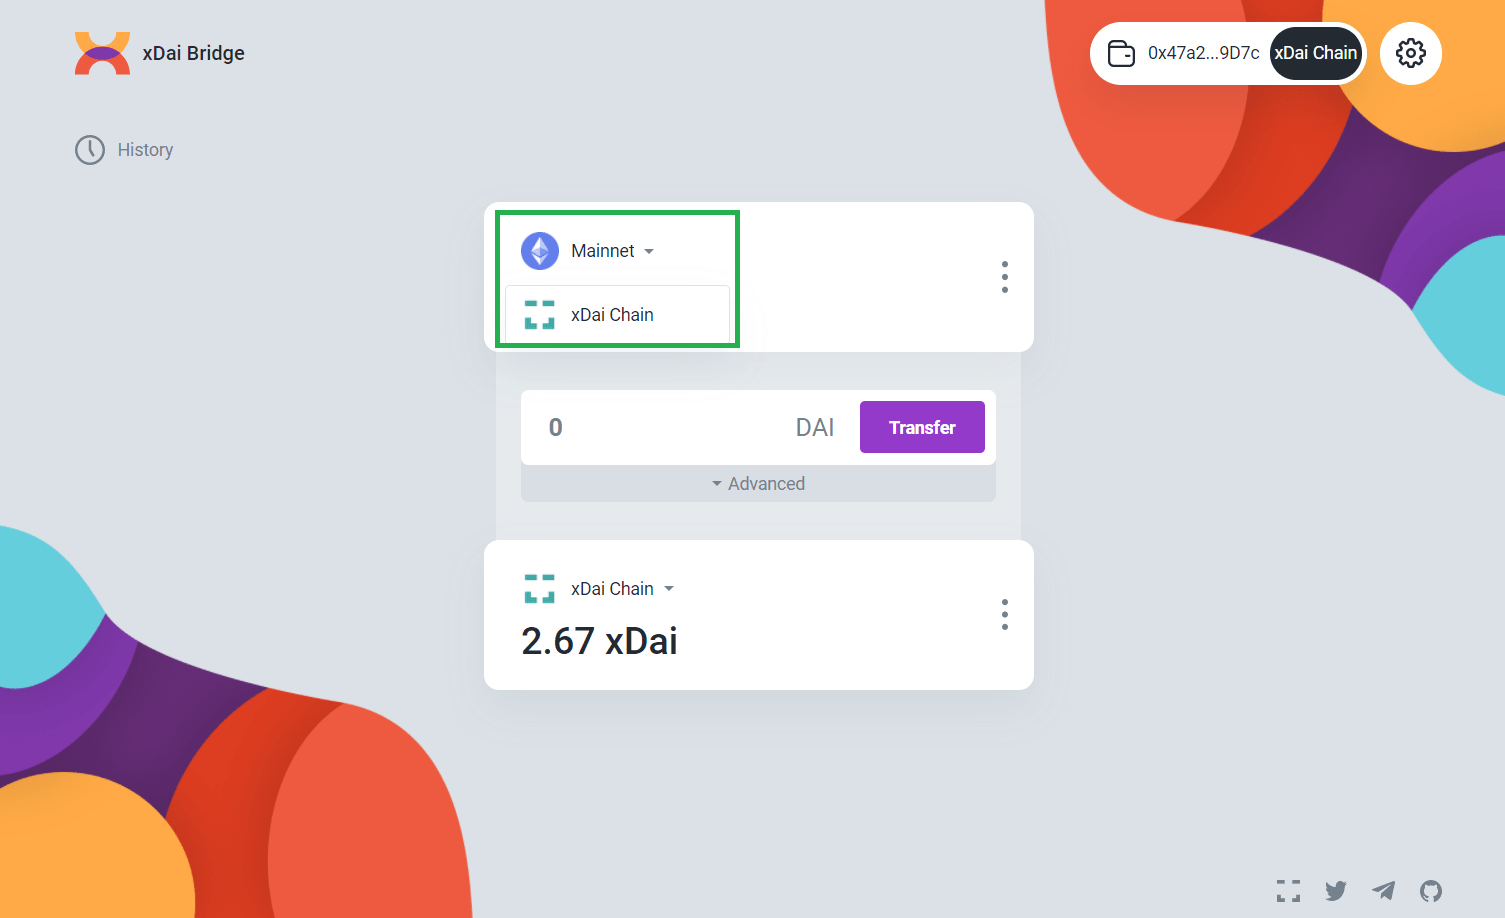
Step 2: Once you have selected your network, input the amount of DAI or xDai you wish to transfer, and click the ‘Transfer’ button. A confirmation box will pop up where you can confirm the details before hitting ‘Continue’
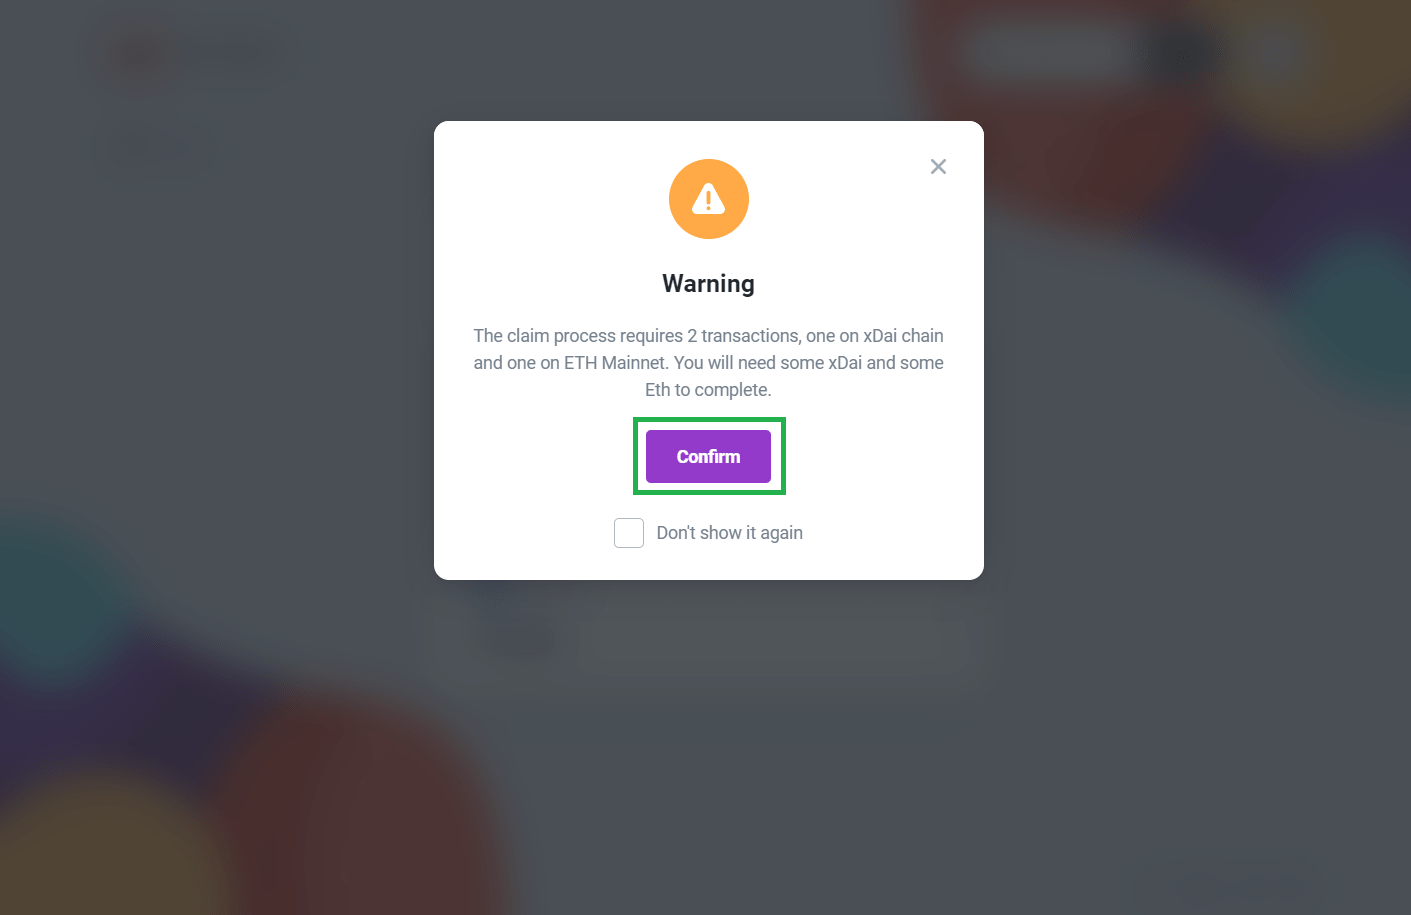
Note: If you are transferring from the Gnosis network to Eth Mainnet, the claim process will require 2 transactions, one on the Gnosis chain, and one on the ETH Mainnet. You will need both xDai & Eth to complete the transfer
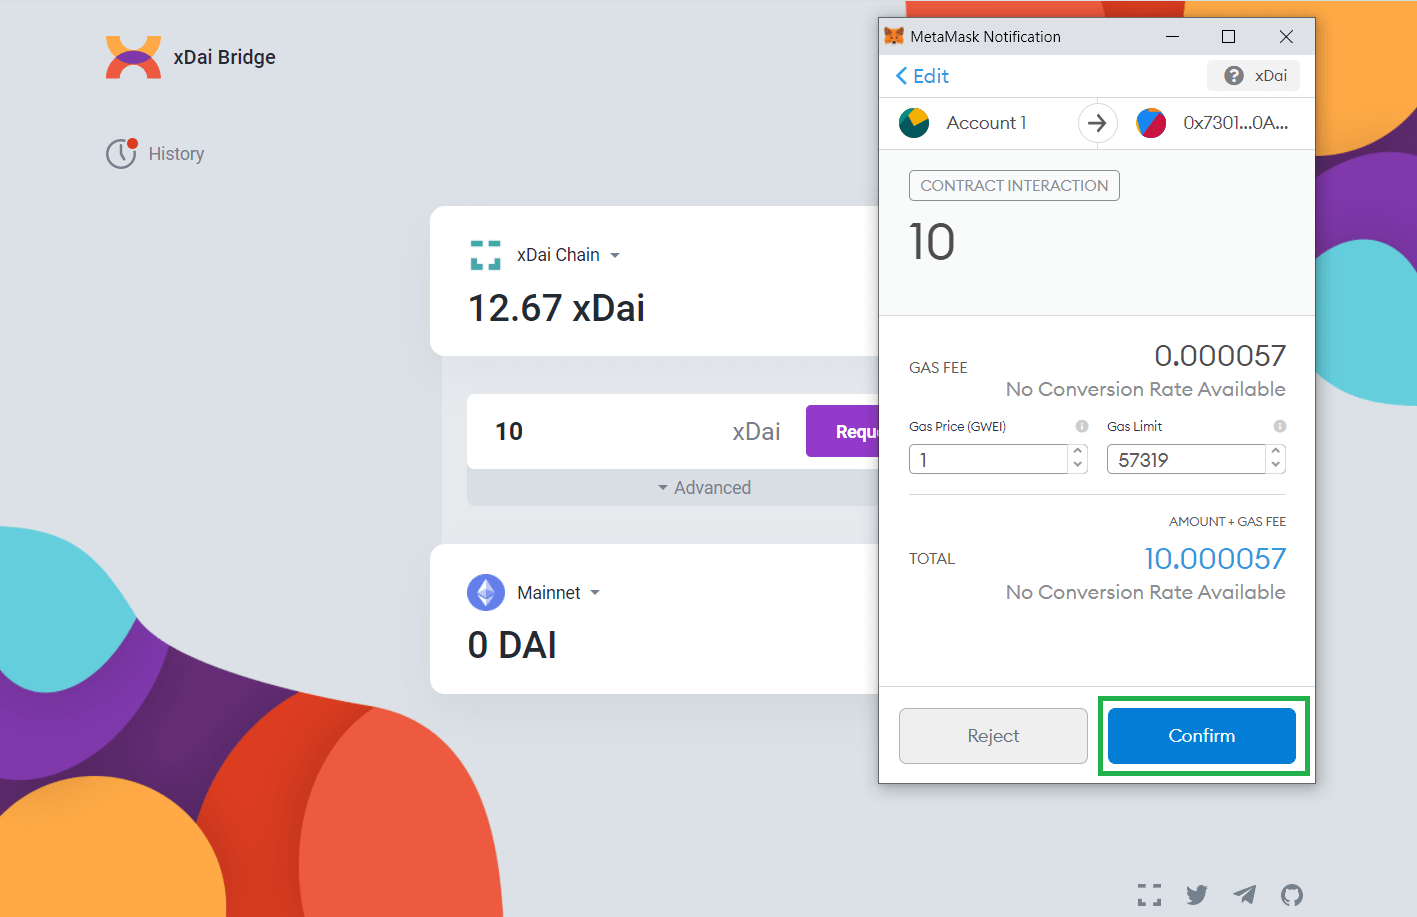
Step 3:Your Metamask wallet will open with the transaction details. Gas fees can be adjusted as necessary (not necessary on the Gnosis network). Once you’re ready to proceed, hit ‘Confirm’.
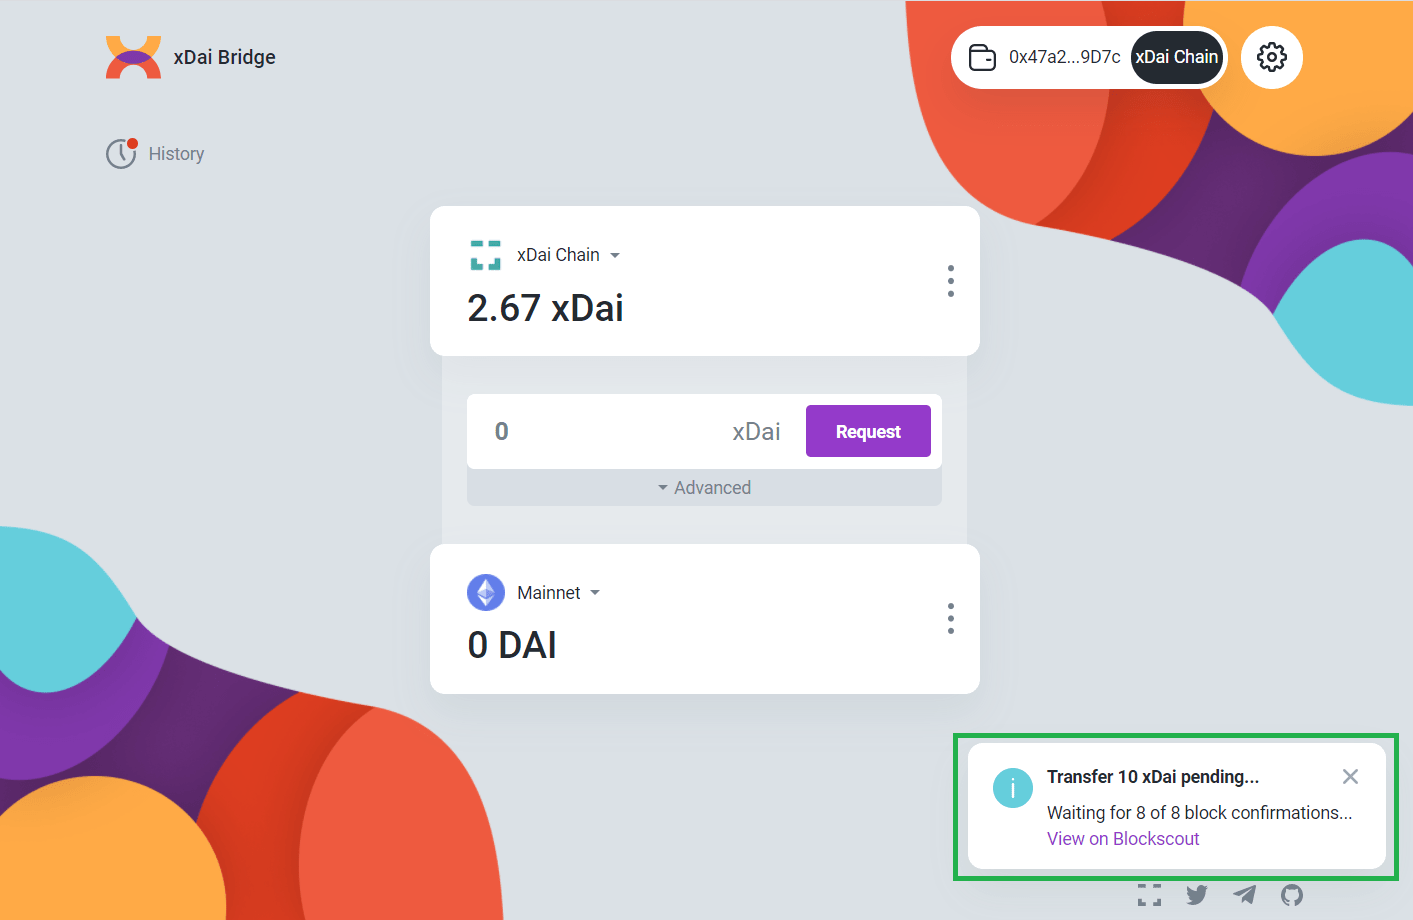
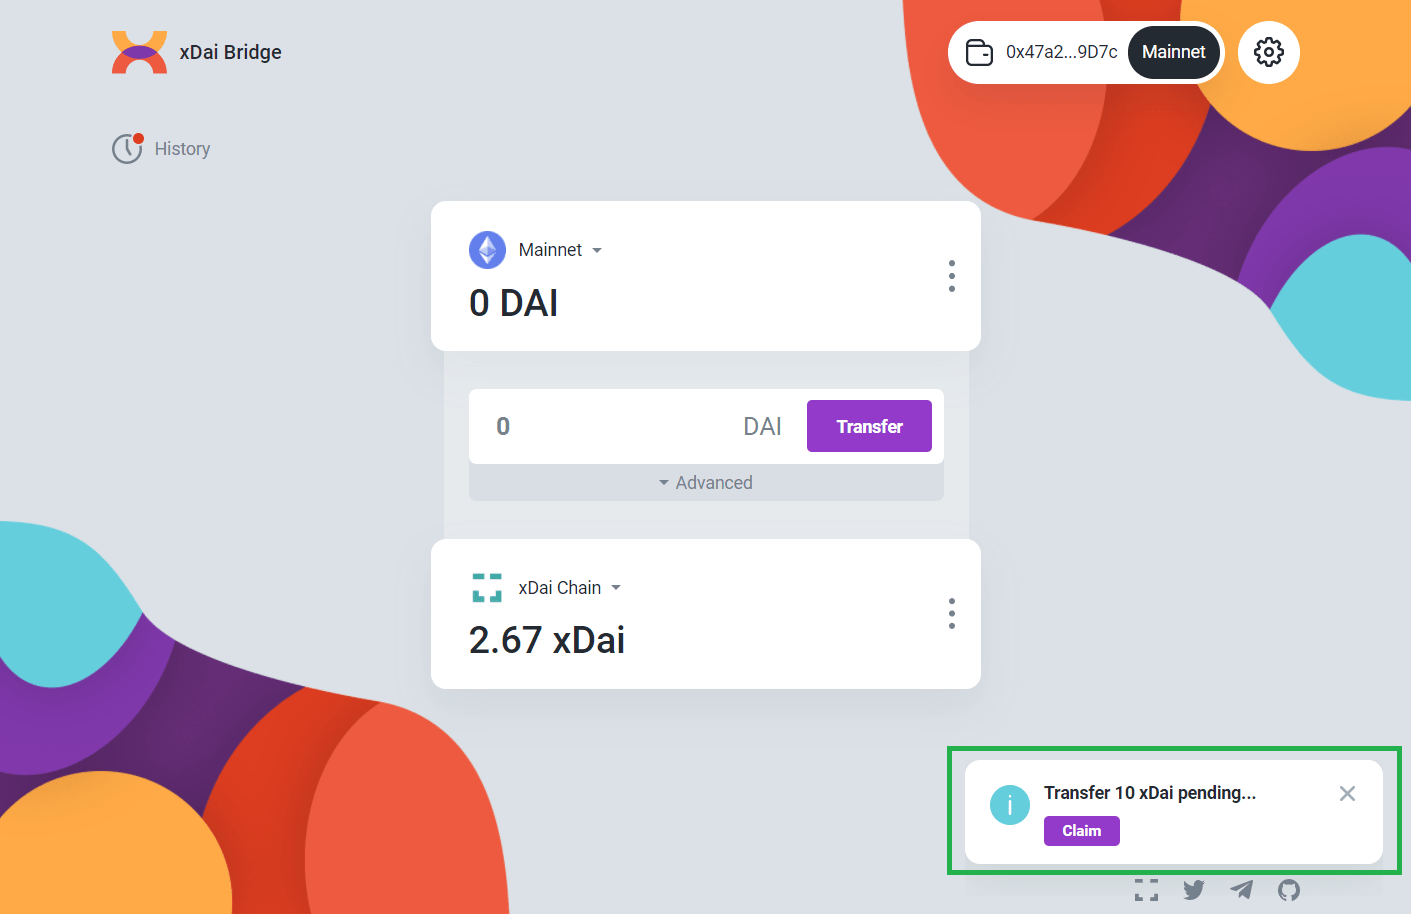
Step 4:Once you confirm, the details of the transaction can be viewed in the bottom right corner of the page. The first step is to wait for the block confirmations. Once completed, the message will change and you are ready to switch networks to claim your tokens.
Step 5:Now you can switch networks via your MetaMask wallet by clicking the extension, and changing the network as requested. For this tutorial we will switch to Mainnet as requested.
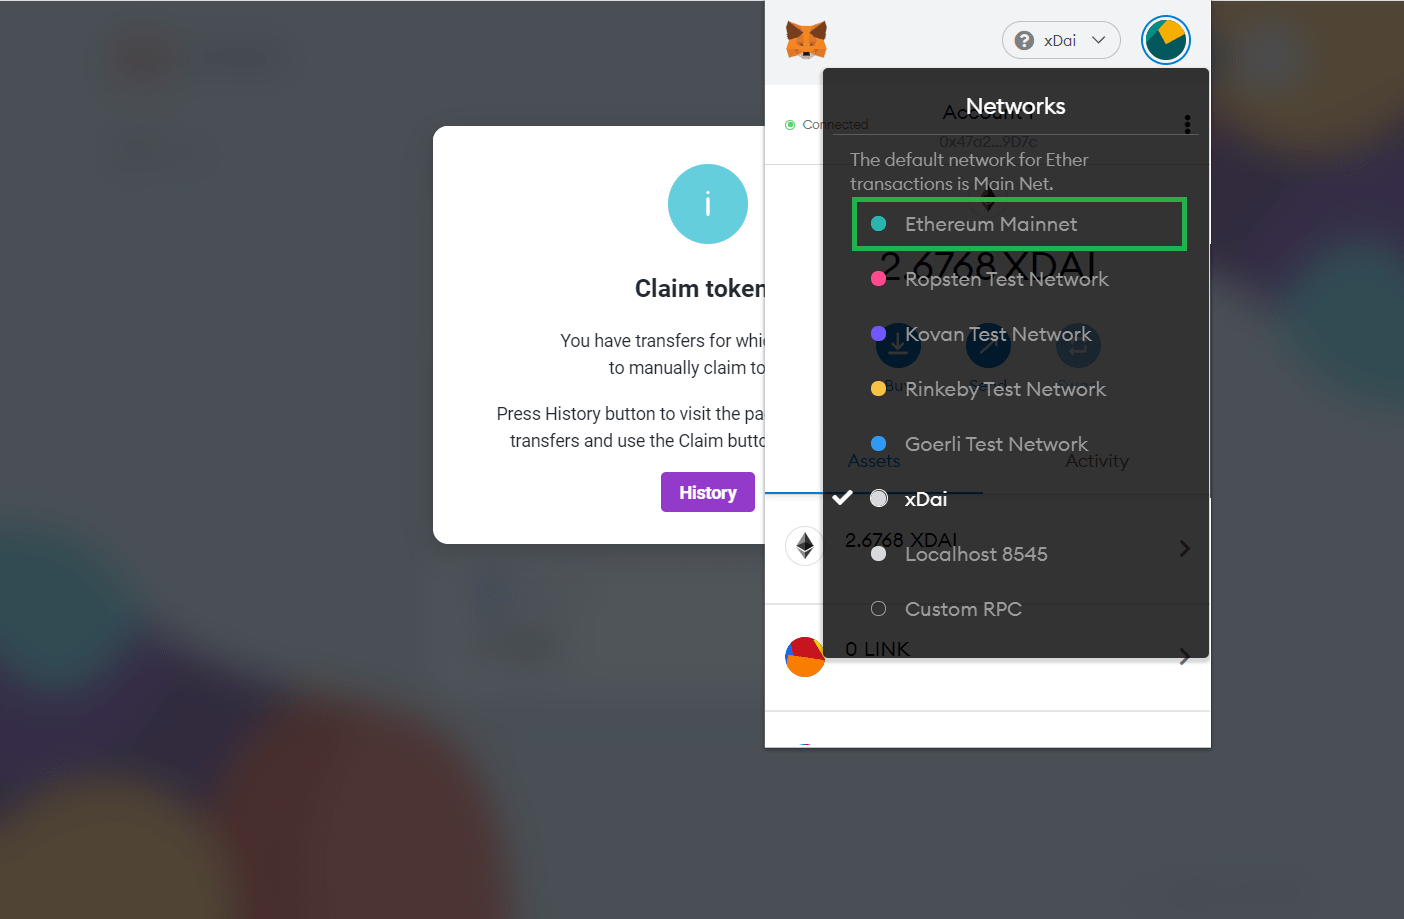
Step 6:Simply click ‘Claim’ to start the transaction on that network to claim your tokens which will populate in your MetaMask. Click ‘Confirm’ in your Metamask to proceed. Once the transaction confirms, the tokens will appear in your wallet. You can use the ‘History’ tab on the left to check your transactions at any time.
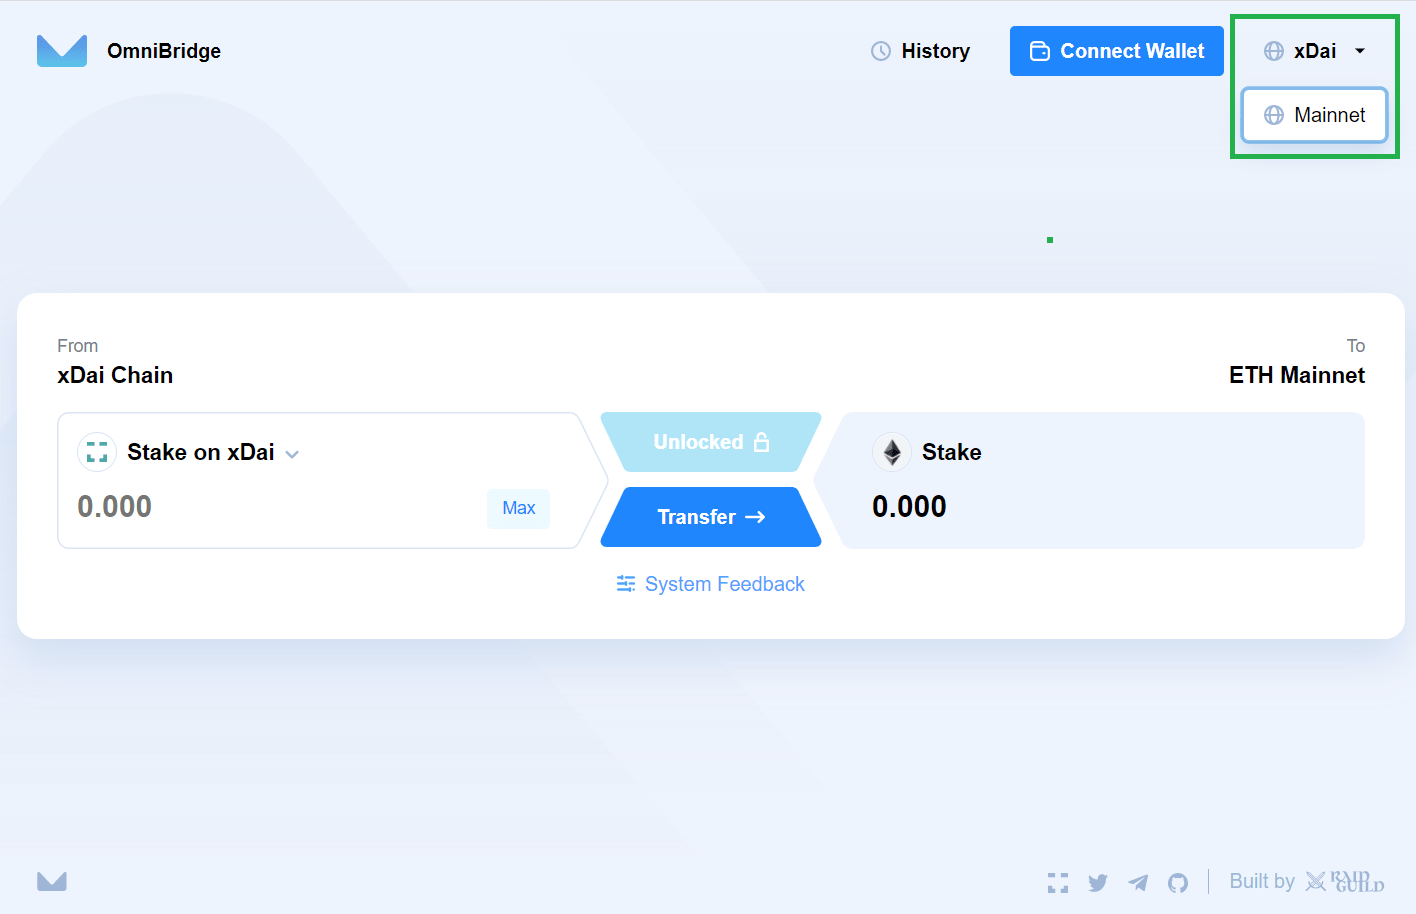
Step 1:Go to https://omni.gnosischain.com/ and once you are on the Omnibridge webpage, select the network you wish to transfer from. If you are transferring from Ethereum to layer 2 Gnosis, use the ‘Mainnet’, if you are transferring from Gnosis layer 2 to Ethereum, use the ‘Gnosis Chain’
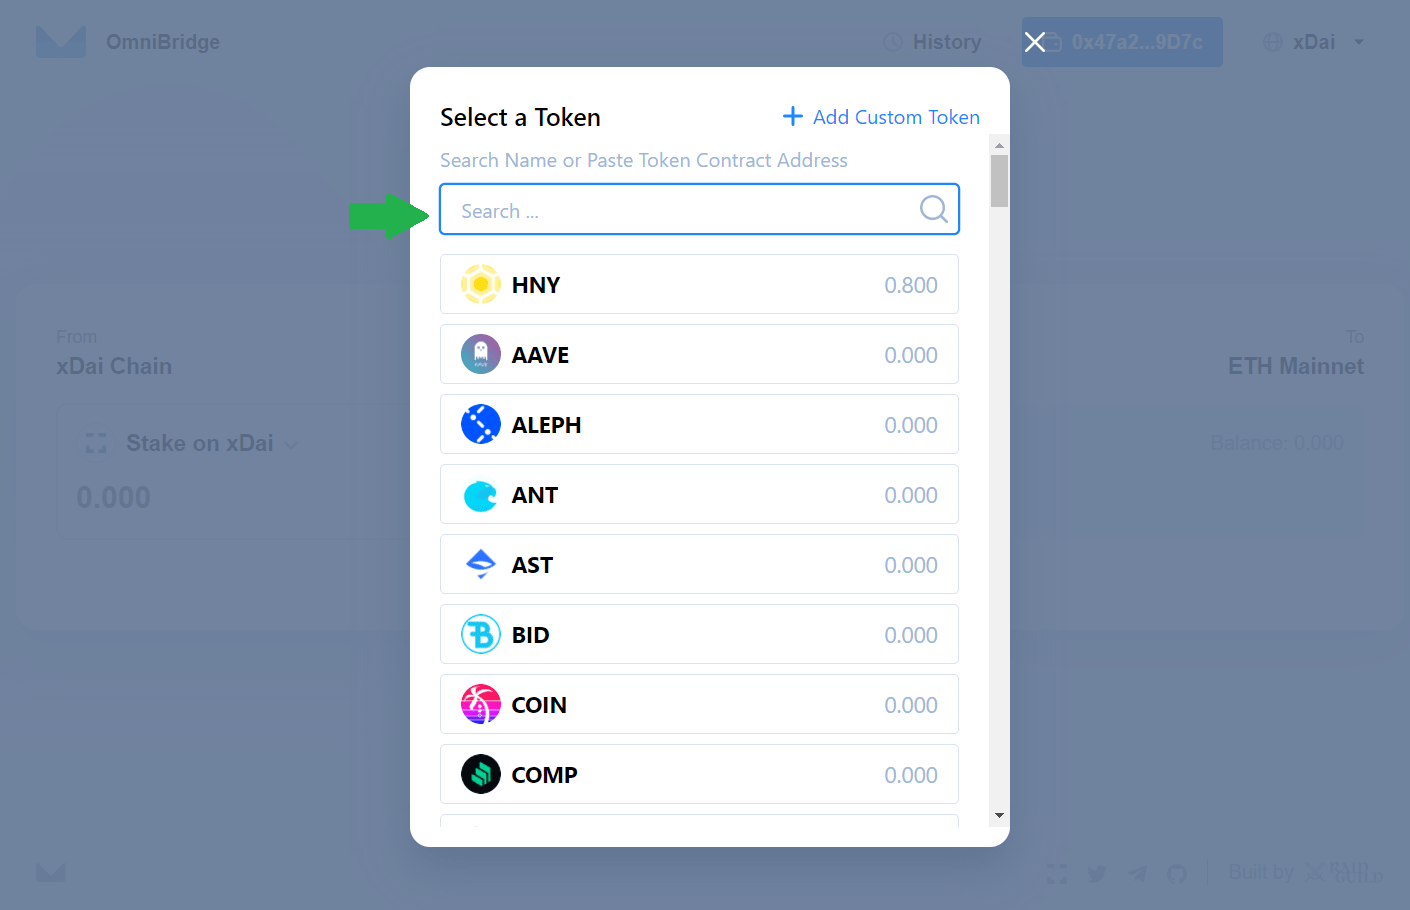
Step 2:Click the drop down menu, and choose the token you would like to transfer.
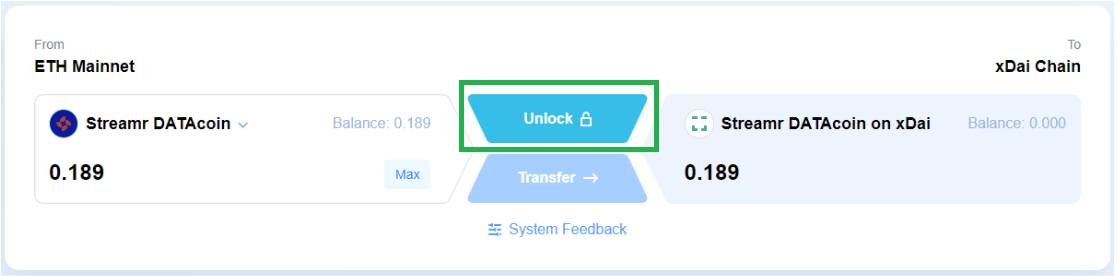
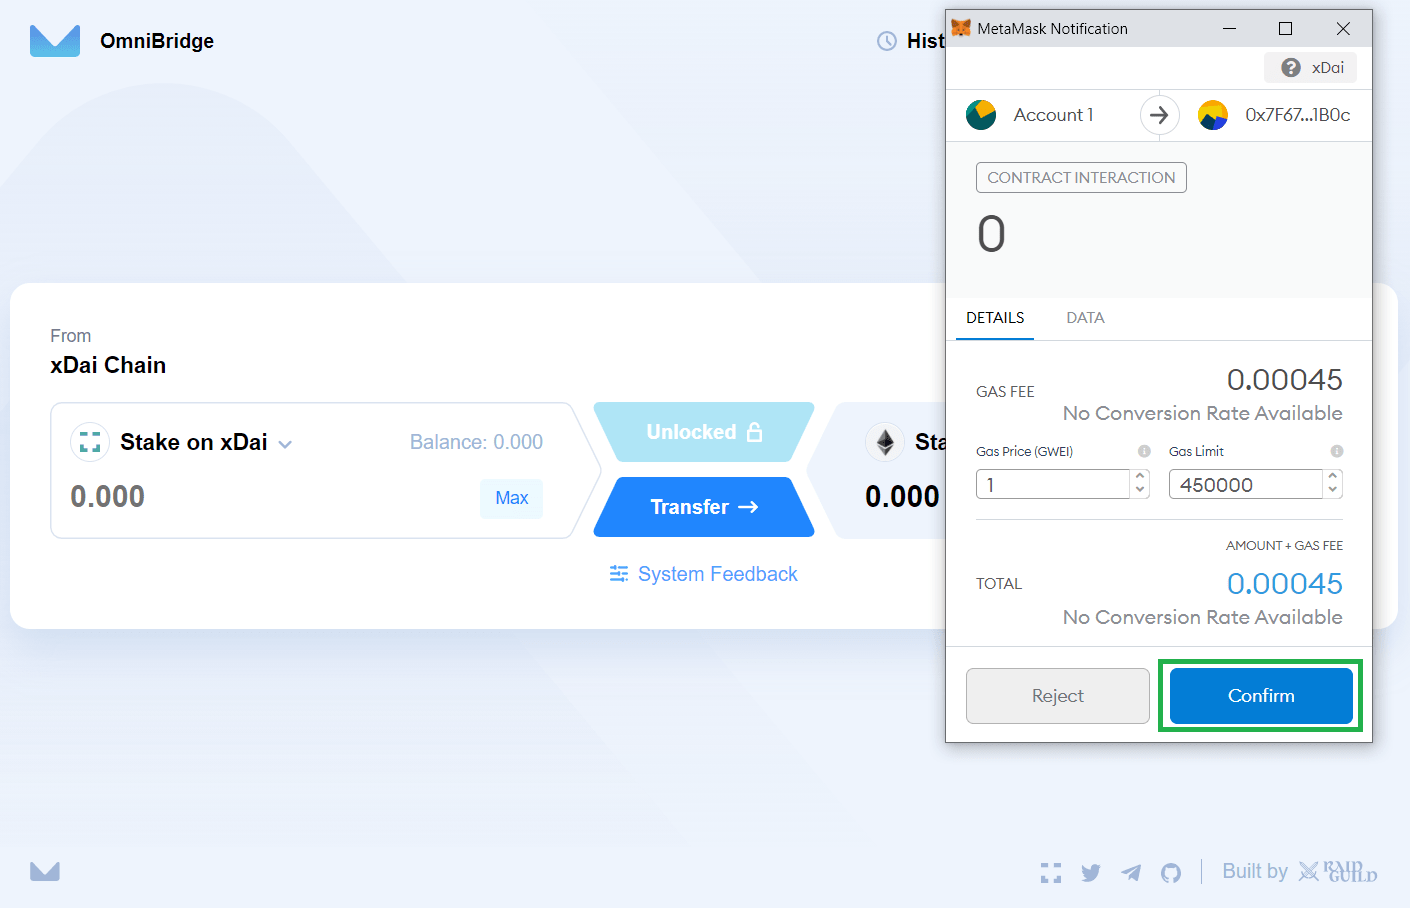
Step 3:Once you’ve selected your token, enter the amount you want to send or click the max to send them all. Once you’re ready, click ‘Unlock’ and it will transfer to your MetaMask to sign a transaction. You can adjust your fees, or proceed by clicking ‘Confirm’.
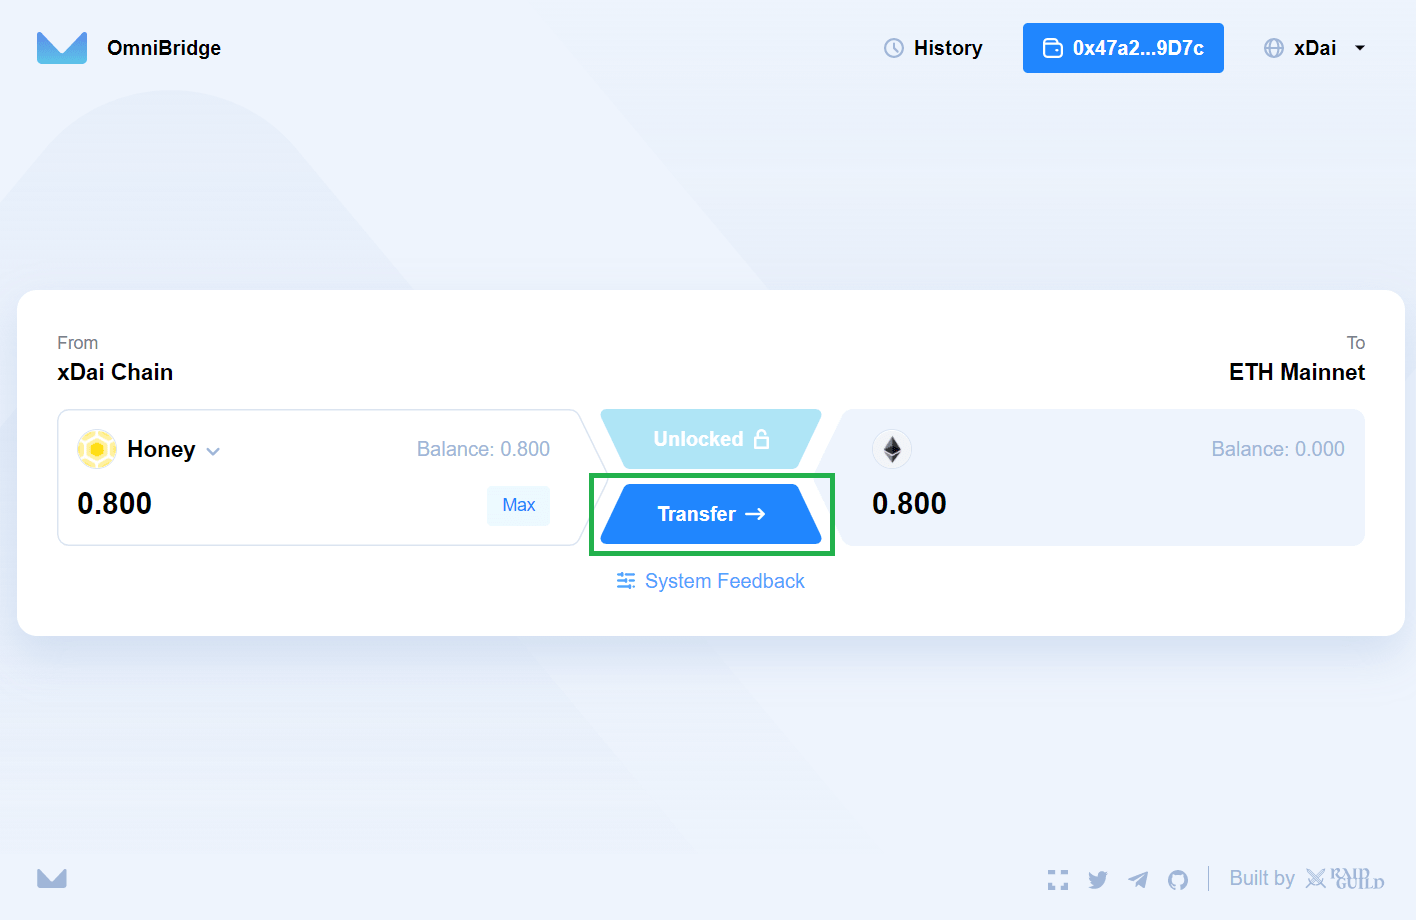
Step 4:Once the transaction is confirmed on the blockchain, you will be able to click ‘Transfer’. You’ll have to press ‘Confirm’ again in your MetaMask to sign the transfer transaction
Step 5:Now you can switch networks via your MetaMask wallet by clicking the extension, and changing the network as requested. For this tutorial we will switch to Mainnet as requested.
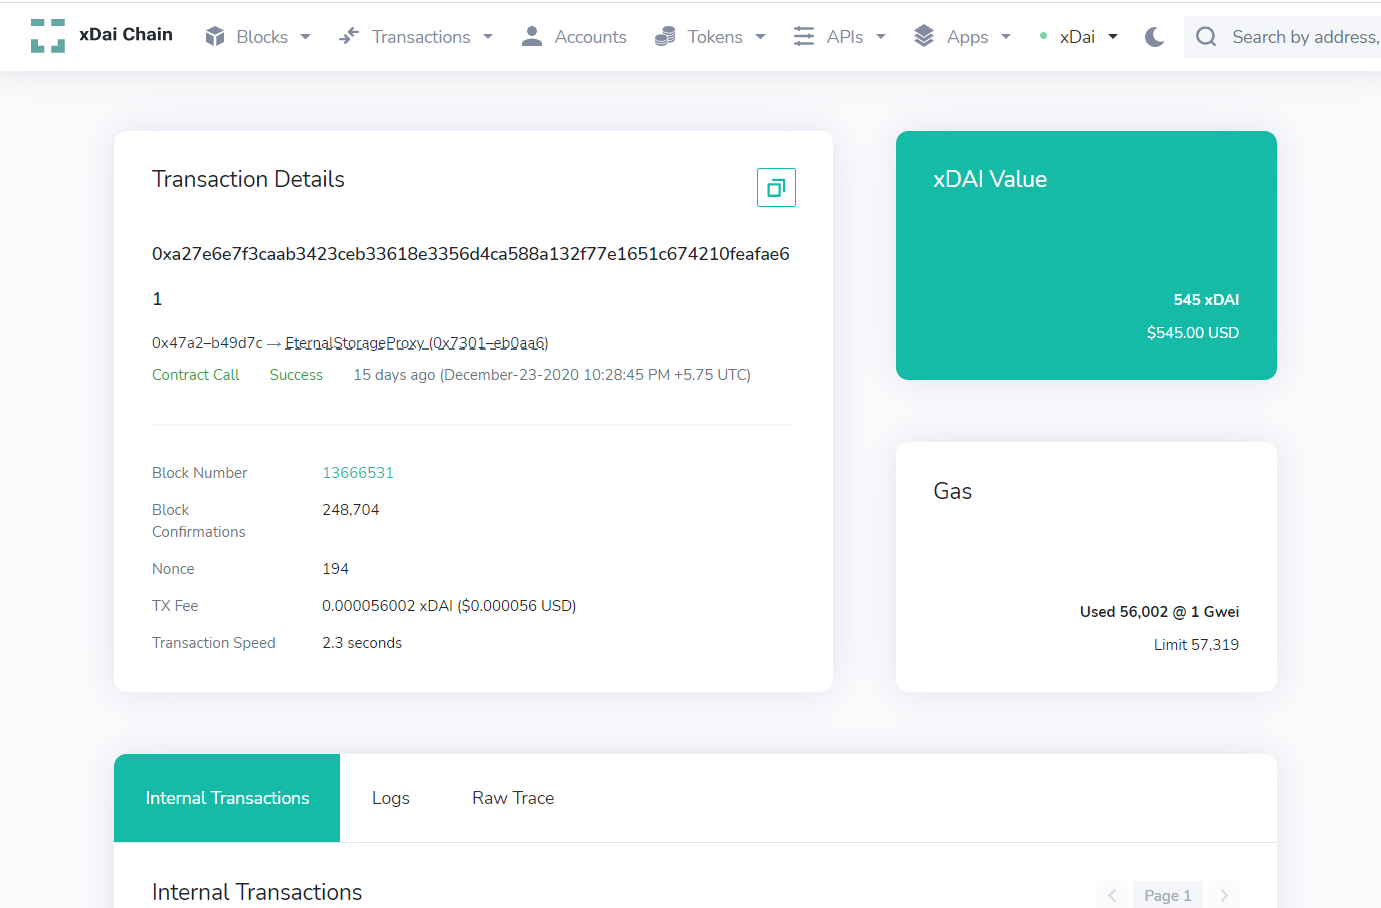
Step 6:Once your transfer is completed, you can view it on the block explorer for the network you’re using, or add the custom token to your MetaMask
Block explorer for Ethereum:
https://etherscan.io/
Block explorer for Gnosis:
https://blockscout.com/poa/xdai/
Previous Tutorial
Next Tutorial